Warm-Then-Stretch Protocol for Grade 1 Hamstring Strain: A 14‑Day At‑Home Plan
A gentle, science-backed routine that uses heat first and targeted moves second to speed up recovery from a mild hamstring strain—complete with safety checks, easy equipment, and a day‑by‑day guide.
- Apply gentle heat (not hot) for 8–12 minutes before mobility to improve comfort and tissue pliability.
- Follow a 14‑day progression from isometrics to slow eccentrics, guided by a simple pain scale.
- Use 24‑hour symptom response and clear safety checks to know when to push, pause, or seek help.
When your hamstring twinges during a sprint, lunge, or quick pickup, the first impulse is often to stretch it hard or ice it right away. For a Grade 1 hamstring strain—a mild, microscopic injury with no loss of strength—there’s a kinder path that helps many people feel safe, mobile, and confident again: warm-then-stretch. This approach layers gentle heat before mobility and controlled strength, so tissues move better, pain is downregulated, and your brain says, “Yes, we can.”
This guide walks you through a practical 14-day plan for a Grade 1 strain you can manage at home. It includes what to feel for during each step, a simple pain-scale action table, and clear checkpoints to decide whether to push forward or hold back. If at any point your pain spikes, strength drops, or bruising spreads, skip ahead to the safety checks and contact a qualified clinician.
Why “Warm‑Then‑Stretch” Works (and When Not to Use It)
Heat calms the nervous system and increases local blood flow, which can reduce the sensation of stiffness and make gentle movement feel safer. Warming the area can also improve muscle extensibility for a short window (about 10–20 minutes), which is ideal for light mobility work and the controlled loading your hamstring needs to remodel well.
In a mild strain, the goal is not to force flexibility, but to invite range back gradually while laying down stronger, better-aligned fibers. Applying heat first helps you do just that—moving with less guarding and more control—so your brain updates the area from “threat” to “safe to move.”
However, heat is not for every situation. Avoid heat if you have a suspected higher‑grade tear (significant weakness, a sudden pop with immediate disability, or a palpable gap), new or spreading bruising, marked swelling, an open wound, decreased sensation in the area, a known blood clot, or uncontrolled diabetes or vascular issues. In those cases, consult a clinician for tailored guidance.
For most Grade 1 strains—soreness without major loss of function—gentle heat is a helpful priming step before mobility and low-load strengthening.
The 14‑Day At‑Home Plan
Use this plan if your hamstring feels tight or sore after a minor twinge, but you can still walk and perform light daily tasks. Each session begins with heat, moves into range-of-motion and light activation, and finishes with slow, controlled loading. Keep your movements smooth and stop sets if pain exceeds a 3/10.
Equipment you’ll need: a microwaveable heat pack or warm shower, a towel, a light resistance band, a backpack (for later loading), and a chair or low bench.
Before You Start—Your Baseline: Note your current symptoms at rest, when walking, and when gently hinging at the hips. Rate soreness 0–10. If you feel more than a mild ache (3/10) at rest, or if you notice new bruising or weakness, pause here and get evaluated.
Session Structure (most days):
- Heat: 8–12 minutes, warm not hot, with a thin cloth between skin and pack.
- Mobility: 3–5 minutes of gentle range-of-motion.
- Strength: 8–12 minutes, starting with isometrics and progressing to slow eccentrics.
- Cooldown: Easy walking 3–5 minutes; optional light self-massage to the thigh.
Days 1–3: Calm It Down, Keep It Moving
- Heat (8–12 min): Warm the back of the thigh; aim for soothing, not hot.
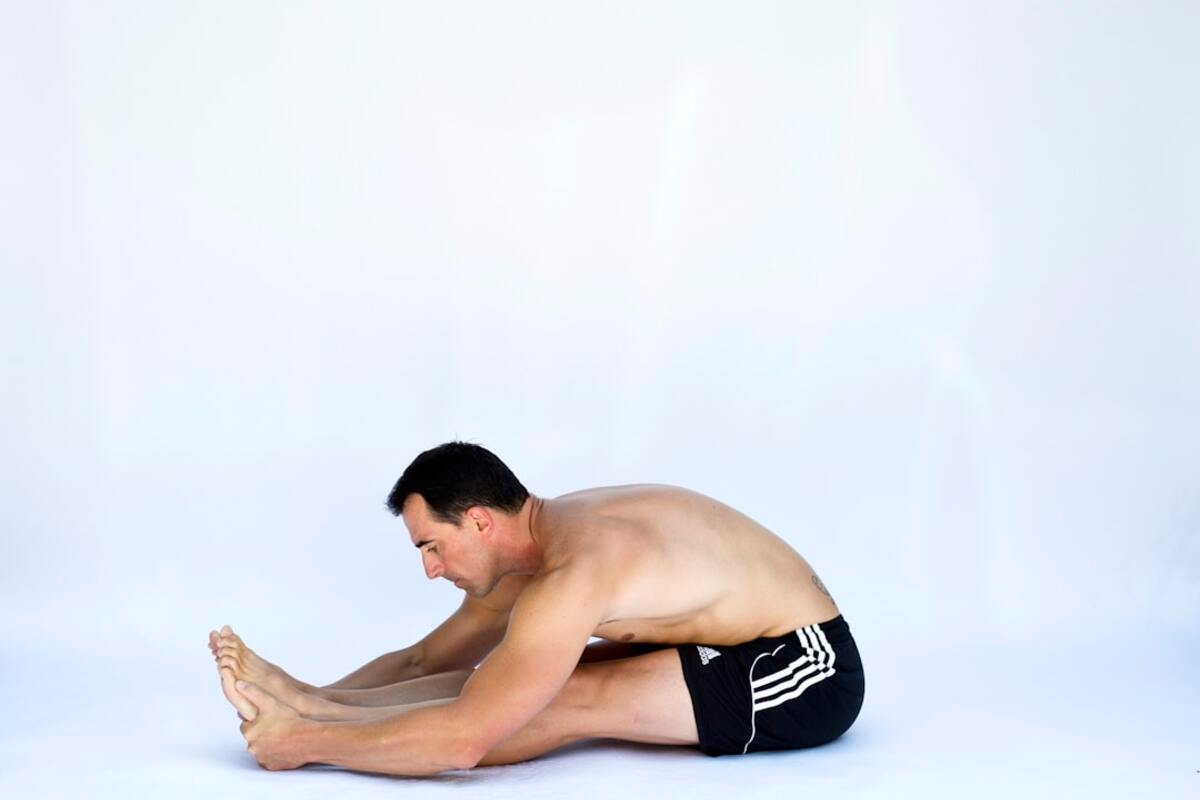
- Mobility (3–5 min):
- Heel Slides on Floor: 2 sets of 10–12 per side, small range, pain ≤ 3/10.
- Seated Knee Extensions (short arc): 2 sets of 8–10, slow and easy.
- Strength (8–10 min):
- Hamstring Isometric Heel Dig (knee bent ~90°): 3 sets of 20–30 seconds, 30–50% effort.
- Glute Bridge (bodyweight): 2 sets of 8–10, slow, no hamstring cramping.
- Walking: 5–10 minutes at an easy pace after your session.
Goal: Reduce guarding, restore gentle ranges, and feel safe loading at low effort. Soreness should settle within 24 hours.
Days 4–7: Add Control, Start Lengthening Under Load
- Heat (8–10 min): Same setup. If skin is sensitive, shorten to 6–8 minutes.
- Mobility (4–5 min):
- Supine Band-Assisted Leg Raise (light band): 2 sets of 8 per side, slow up/slow down.
- Standing Hip Hinge (hands to wall): 2 sets of 8–10, neutral back, tiny hamstring stretch allowed.
- Strength (10–12 min):
- Progressed Isometric Heel Dig: 3 x 30–40 seconds, 40–60% effort.
- Bridge with Hamstring Bias: Heels further from hips; 3 sets of 6–8, 3-second lowers.
- Heel Slides with Mini Hold: 2 sets of 8–10 with a 2-second pause near stretch.
- Optional: Gentle foam roll to quads and glutes (not directly on the sore spot) 1–2 minutes.
Goal: Begin very light eccentrics via slow lowers and paused positions while keeping pain ≤ 3/10.
Days 8–11: Slow Eccentrics, Slight Load
- Heat (8–10 min), then:
- Mobility (5 min):
- Active Straight-Leg Raise (no band): 2 sets of 8–10 per side, controlled.
- Standing Hip Hinge to Mid‑Shin (no weight): 2 sets of 8, 3–4 seconds down.
- Strength (12–15 min):
- Single-Leg Isometric Bridge Hold (knee softly bent): 3 x 20–30 seconds each side.
- Slow Eccentric RDL Pattern with Backpack (2–5 kg): 3 sets of 6, 4–5 seconds down, 1–2 seconds up, both legs.
- Hamstring Curl with Light Band (seated or prone): 2 sets of 10, 2 seconds up/3 seconds down.
- Walk 10–15 minutes post-session. If you’re a runner, add 5 x 60 seconds brisk walk with 60 seconds easy.
Goal: Build tolerance to slow lengthening under light load. Watch the 24‑hour response—mild next‑day soreness is fine; sharp pain is not.
Days 12–14: Return to Spring
- Heat (6–8 min), then shorter warm‑up walk (5 min).
- Mobility (5 min):
- Dynamic Leg Swings (front‑to‑back): 2 sets of 10 small arcs each side.
- Hip Hinge to Comfortable Range with Stick: 2 sets of 8, crisp form.
- Strength and Elasticity (12–18 min):
- Backpack RDL (3–8 kg): 3 sets of 6–8, 3–4 seconds down, steady up.
- Bridge March (slow): 2 sets of 10 total steps, keep hips level.
- Intro to Low‑Level Elasticity: 3 x 10 “snap‑downs” (tall to hip hinge quickly, stop before pain), rest 45 seconds.
- Run‑Walk Readiness (if applicable): 8–12 minutes alternating 60 seconds easy jog / 90 seconds walk, stop if pain > 3/10 or form changes.
Goal: Re‑introduce a hint of speed and rhythm without sacrificing control. If you feel tight after sessions, a warm shower and easy walking are excellent cooldowns.
The 24‑Hour Response Rule: If soreness the next day stays ≤ 3/10 and resolves or improves within 24 hours, you can progress. If it’s 4–5/10 or lingers > 24 hours, repeat the same level or reduce one variable (reps, load, or range). Sharp pain, buckling, or bruising means pause and get evaluated.
| Pain During Session | What To Do | Next Step |
|---|---|---|
| 0–2/10 (comfortable) | Proceed as planned | Progress next session if 24‑hour response is good |
| 3/10 (mild, manageable) | Shorten range or reduce reps | Hold at current level for 1–2 sessions |
| 4–5/10 (uncomfortable) | Stop the exercise, switch to easier variation | Regress and reassess next day |
| 6+/10 (sharp or catching) | Stop session | Seek clinician input before resuming |
Safety Checks, Add‑Ons, and Common Mistakes
Quick Safety Screen Before Each Session:
- Any new or worsening bruising, swelling, or warmth? Pause and reassess.
- Any sudden giving‑way or notable weakness vs. the other side? Seek an evaluation.
- Skin status: If you’re using heat, ensure normal sensation and no open wounds.
How Hot is “Warm”? Aim for pleasantly warm, never hot. If using a microwave pack, wrap it in a thin towel. If your skin is pink or itchy, cool it down, shorten the time, or switch to a warm shower. Typical sweet spot is 8–12 minutes. People with reduced sensation should avoid direct heat and consult a clinician.
Breathing and Bracing: During hinges and bridges, exhale softly as you move into effort. Keep ribs stacked over pelvis and avoid arching the lower back. If the hamstring cramps, reduce knee extension (bend knees more), shift effort to the glutes by pressing through heels, or pause for gentle heel slides.
Recovery Add‑Ons That Help:
- Protein in each meal (20–30 g) and steady hydration support tissue repair.
- 7–9 hours of sleep; a 20–30 minute early afternoon nap if nights are short.
- Light walking after sitting > 45 minutes helps circulation and reduces stiffness.
Common Mistakes:
- Stretching too hard, too soon (sharp end‑range pulls delay recovery).
- Skipping slow eccentrics (they’re the secret sauce for resilient hamstrings).
- Returning to hard sprints without a “spring” re‑introduction (snap‑downs, skips, short strides).
Progress Markers You Can Track:
- Walking pace feels easier and stride evens out.
- Hip hinge to mid‑shin without guarding and pain ≤ 2/10.
- Single‑leg isometric bridge hold of 30 seconds without cramping.
- Backpack RDL with 3–8 kg at 3–4 seconds down feels smooth and controlled.
For a mild hamstring strain without major swelling, many people find gentle heat more comfortable before mobility and controlled loading. If you’re very sore right after the tweak or if there’s swelling, a short, cool application can help comfort. As a rule of thumb, choose the option that reduces guarding and lets you move well—then follow with light loading.
For a mild hamstring strain without major swelling, many people find gentle heat more comfortable before mobility and controlled loading. If you’re very sore right after the tweak or if there’s swelling, a short, cool application can help comfort. As a rule of thumb, choose the option that reduces guarding and lets you move well—then follow with light loading.
You can, but many people feel better after a few minutes of warmth. If time is tight, do 2–3 minutes of brisk marching or easy stairs to raise local temperature, then perform gentle mobility. Avoid end‑range pulling—use short arcs and slow eccentrics.
You can, but many people feel better after a few minutes of warmth. If time is tight, do 2–3 minutes of brisk marching or easy stairs to raise local temperature, then perform gentle mobility. Avoid end‑range pulling—use short arcs and slow eccentrics.
Check three boxes: (1) walk briskly 10 minutes with no increase in soreness later; (2) perform 3 sets of 6 slow backpack RDLs pain ≤ 2/10; (3) do 10 small‑arc leg swings each side comfortably. If all pass, try run‑walk intervals and stop if form falters or pain exceeds 3/10.
Check three boxes: (1) walk briskly 10 minutes with no increase in soreness later; (2) perform 3 sets of 6 slow backpack RDLs pain ≤ 2/10; (3) do 10 small‑arc leg swings each side comfortably. If all pass, try run‑walk intervals and stop if form falters or pain exceeds 3/10.
Cramps often come from over‑reaching the hamstring. Try bending knees more, pressing through heels, and engaging glutes first. Reduce range, slow down, and take a short walk. If cramping persists, regress to isometrics and short‑arc heel slides for 1–2 sessions.
Cramps often come from over‑reaching the hamstring. Try bending knees more, pressing through heels, and engaging glutes first. Reduce range, slow down, and take a short walk. If cramping persists, regress to isometrics and short‑arc heel slides for 1–2 sessions.
Seek help if you felt a pop with immediate disability, notice a dent or gap, have spreading bruising, experience night pain or numbness, or cannot progress after 7–10 days despite following a gentle plan.
Seek help if you felt a pop with immediate disability, notice a dent or gap, have spreading bruising, experience night pain or numbness, or cannot progress after 7–10 days despite following a gentle plan.
Micro‑Progressions if You Sit Most of the Day: Set a 45‑minute timer. When it rings, stand, perform 10 heel raises, 10 short‑arc hinges, and a 1‑minute easy walk. Do this 4–6 times daily. The small, frequent exposures help you bank motion without provoking the hamstring.
Micro‑Progressions if You’re a Runner: On non‑session days, try 10 minutes brisk walking plus 3 x 20‑meter strides at 60–70% effort on soft ground, only if pain‑free. Stop before fatigue.
Form Tips for Key Moves:
- Hip Hinge: Keep a long spine, push hips back, and stop before pain. Think “zipper up” to avoid over‑arching.
- Slow Eccentric RDL: Soften your knees slightly. Imagine your sit bones moving back as the weight travels close to your thighs.
- Band Curl: Set the band light. Move like you’re pouring honey—steady, no jerks.
If You Don’t Have a Heat Pack: A warm shower aimed at the back of the thigh for 3–5 minutes works. Step out, towel off, and move immediately into your mobility set while the window of ease is open.
What If You Wake Up Tight? Morning stiffness is common. Do a 3‑minute “wake‑up” circuit: 30 seconds easy marching, 30 seconds heel digs, 30 seconds heel slides, repeat. If still tight, use warm water in the shower and repeat the circuit once more.
What to Do If Pain Spikes Mid‑Plan: Drop back one phase (e.g., from Days 8–11 to Days 4–7), cut total volume by 30–50%, and focus on isometrics with heat first. Resume progression once your 24‑hour response returns to ≤ 3/10 soreness that fades.
Returning to Sport or the Gym: When you can complete the Day 12–14 session with pain ≤ 2/10 and a good 24‑hour response, add one variable per 48 hours: a bit more load, a bit more range, or a touch more speed. Avoid adding two variables at once. Before max efforts or sprints, include warm‑then‑stretch, then 2–3 short accelerations at 70–80% to wake up elasticity.
Red Flags (Stop and Seek Help):
- A pop with immediate pain and inability to walk normally.
- Visible dent or gap, or rapidly spreading bruising.
- Numbness, tingling, or weakness compared to the other side.
- Night pain that wakes you or escalating pain despite rest.
Simple Warm‑Then‑Stretch Checklist (print or screenshot):
- Heat 8–12 min (towel barrier; warm, not hot)
- Mobility 3–5 min (short arcs, no end‑range pull)
- Strength 8–15 min (isometrics → slow eccentrics)
- Walk 5–15 min (easy, even stride)
- Log pain now and 24 hours later
Your hamstring doesn’t need heroics—it needs consistency. Apply warmth to quiet resistance, move within comfort to rebuild trust, and load slowly to forge resilient fibers. Measured steps today become sprint‑ready strides tomorrow.